Project webhooks allow you to trigger a URL if for example new code is pushed. You can configure webhooks to listen for specific events like pushes or merge requests. GitLab will send a POST request with data through webhook to specific URL.
To integrate GitLab to QuickScrum with help of webhook,
1. Go to your GitLab account and Sign in.
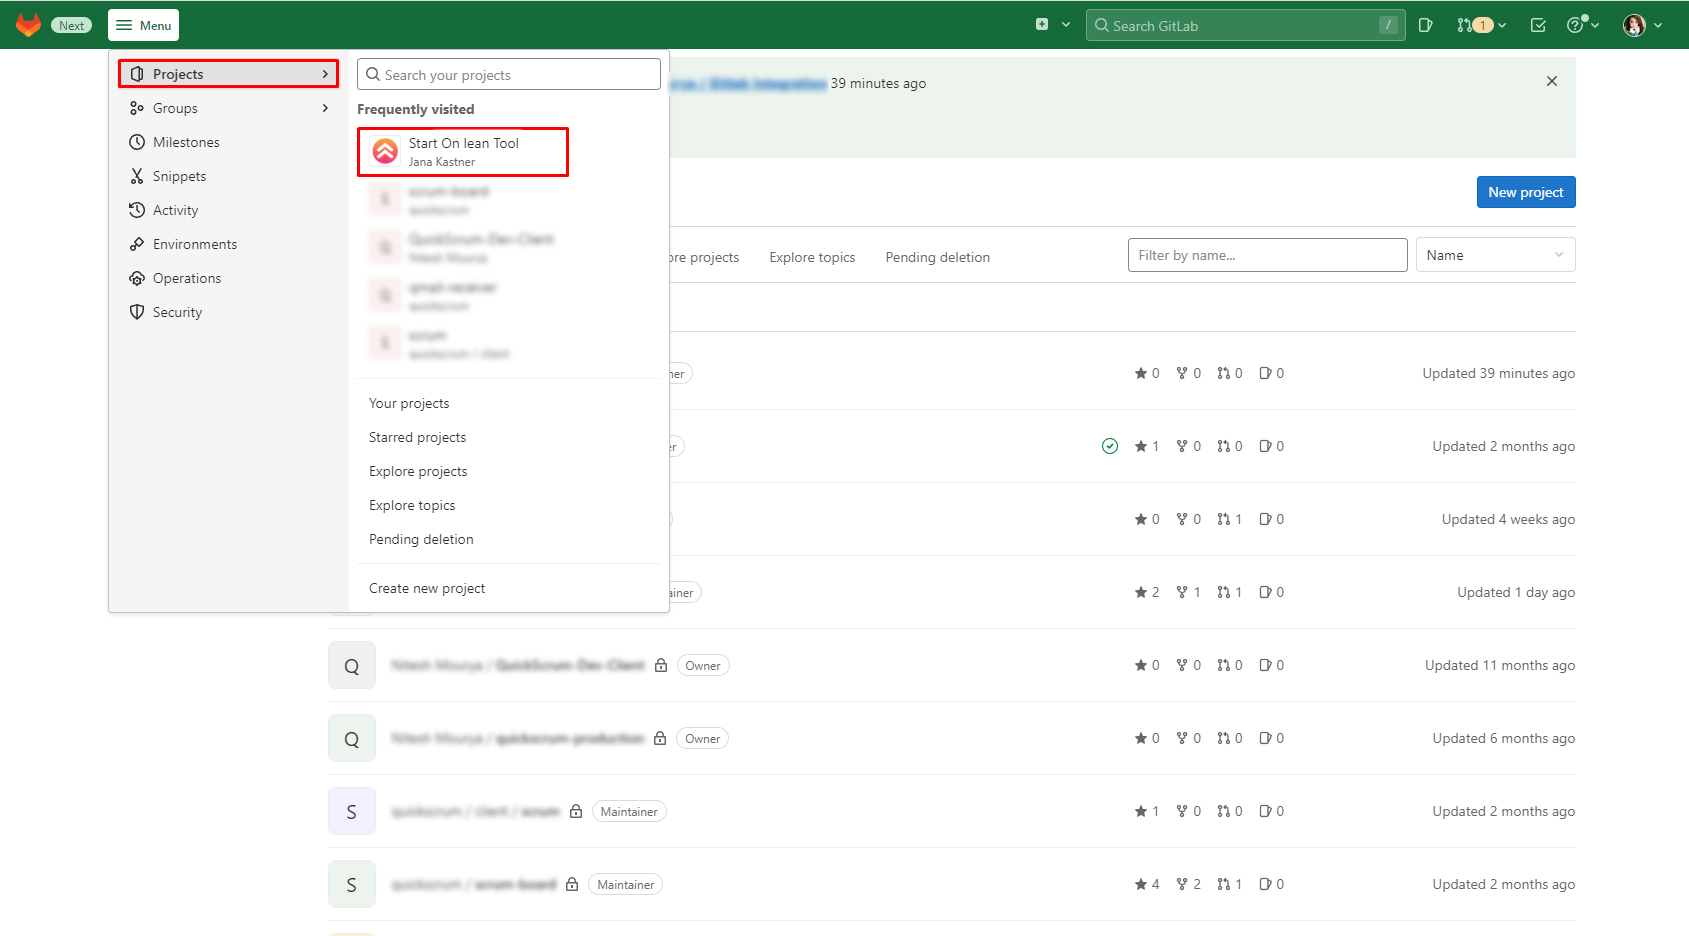
2. Click on Projects and Select the project for which you would like to integrate webhook.
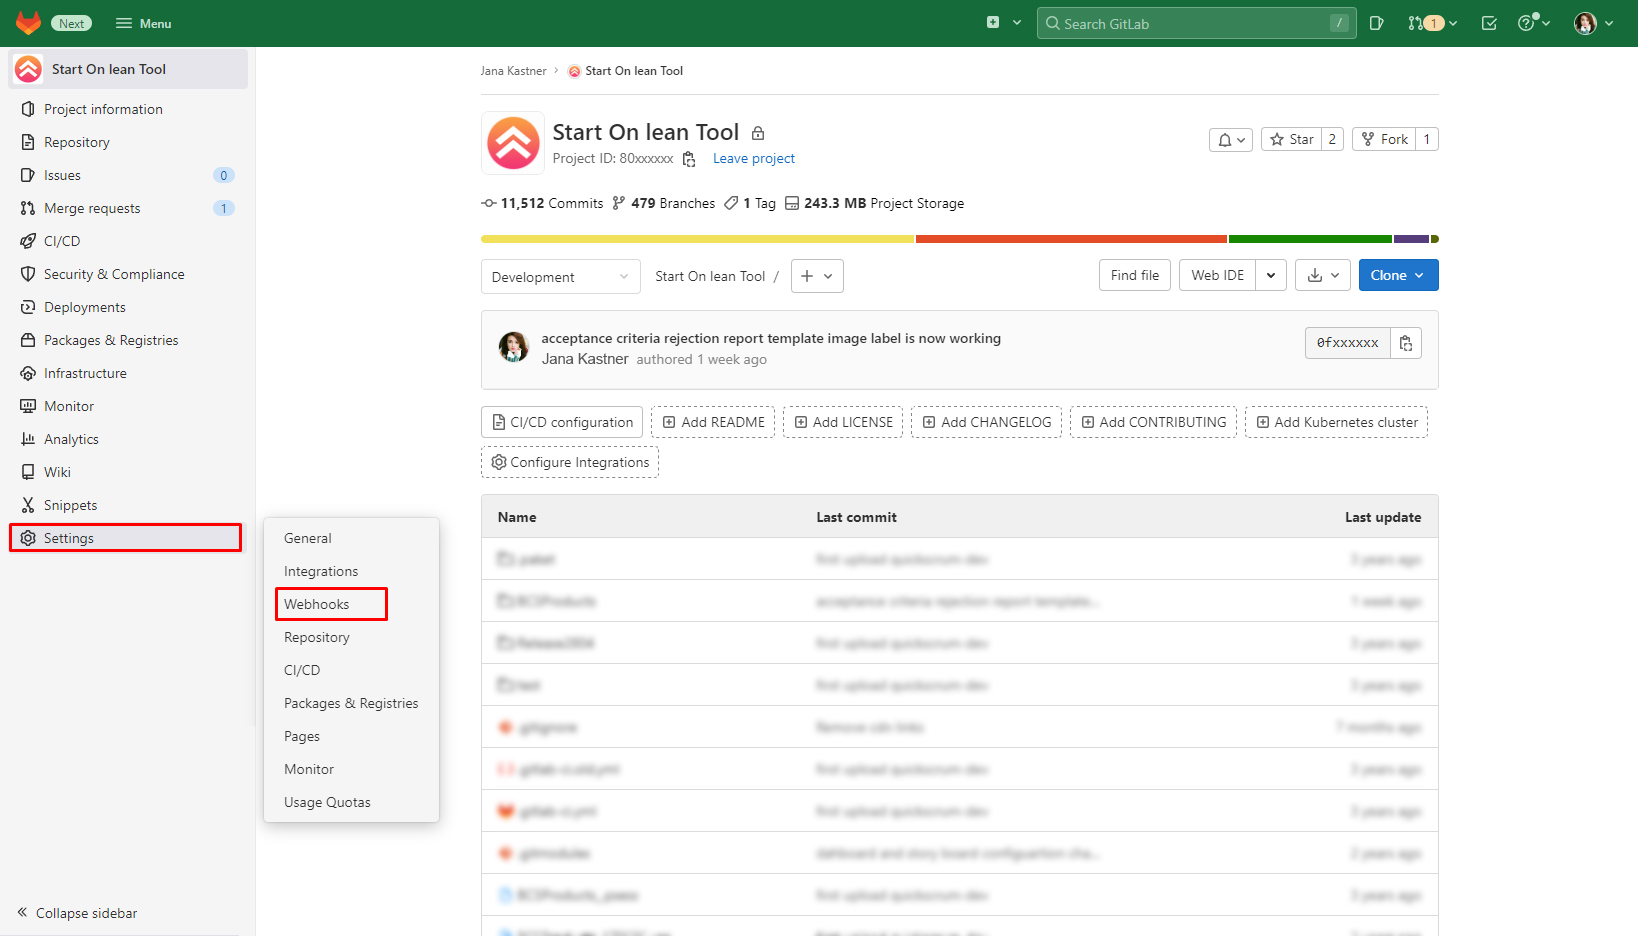
3. Choose settings from left menu and click on webhooks option.
4. In URL field paste the following URL.
https://quickscrumgitapi.azurewebsites.net/api/git-webhook
5. In Secret Token field paste the following key..
35d253a69dcbcfeaf4ac55b06f6654226579d398
6. By default Push events and Enable SSL Verification would be checked. Keep them as it is.
7. Additionally check Merge Request events. So push events, Merge Request events & Enable SSL Verification should be checked.
8. Click on Add webhook.
To integrate QuickScrum with your GitLab repository,
1. Click on Project setting icon and Select Integrations from the dropdown.
2. Click on GitLab
3. Enter URL, Application ID & Secret ID.
Here, URL will be https://gitlab.com.
Application ID & Secret ID needs to be generated.
To generate your Application ID & Secret ID,
– Go to your GitLab account and Sign in.
– Go to Profile dropdown and click on Edit profile.
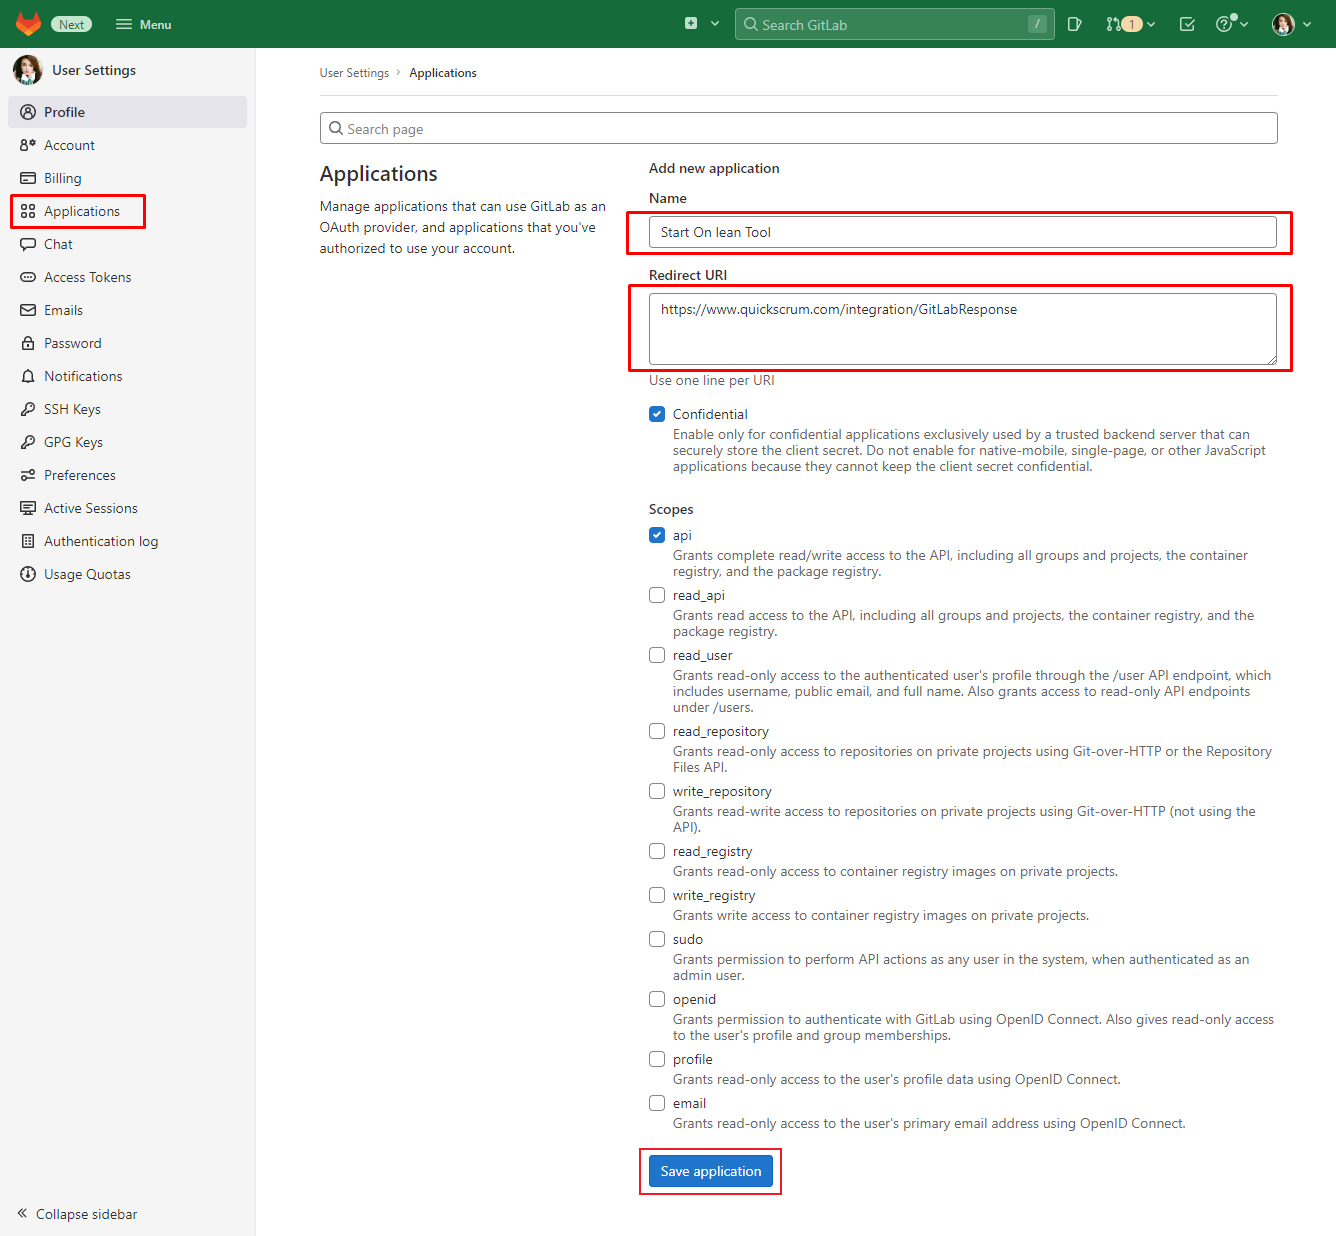
– Select Applications tab as shown below.
– Give appropriate name to your project.
– Enter Redirect URL as https://www.quickscrum.com/integration/GitLabResponse. This is pre-generated Redirect URL for QuickScrum.
– Check the option “api” under Scopes section.
– Click on Save application.
– Once you save Application, The application ID & Secret ID would be generated.
4. Copy both Application ID & Secret ID and paste in QuickScrum’s GitLab integration settings.
Click on Connect
5. Once you connect, the next step is to generate access token.
6. Go to profile section and click on Edit profile option.
7. Click on Access Token under User Settings (i.e. Left Menu) in your gitlab account.
8. Give the name for your access token
Make sure Expiration date should be blank
Check api option
Click on Create personal access token button
9. Copy the access token.
10. Now, come back to quickscrum gitlab integration page and paste the access token in Access Token field and click on save button
11. Check the Active option to enable Gitlab Integration.
12. After enable Gitlab Integration next step is to add repository, In order to do so please select an repository from the Add Gitlab Repository dropdown.
13. Now you would be able access gitlab repository in Story as shown below.


