
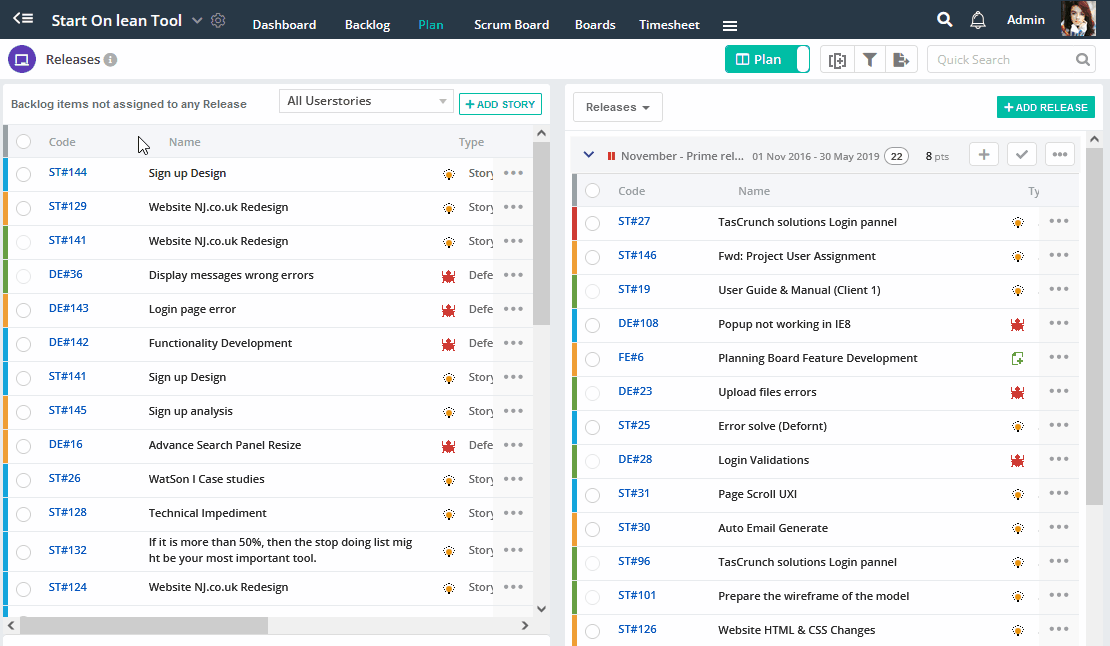
User can assign unassigned stories or can create a new story in release backlog.
1. Drag stories from Unassigned Backlog.
User can directly drag the unassigned stories from Backlog items not assigned to any Release to release backlog. As a user drags unassigned user story to release backlog it will be converted to release story.

2. Add Story to Release Backlog.
There are two ways to add user story to release backlog.
a) Add story from unassigned story tab.
b) Add story directly from release backlog.
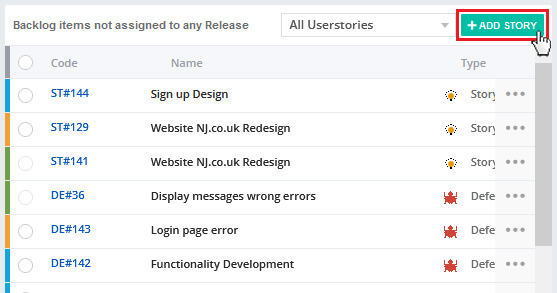
Add story from unassigned story tab.
User can add a story from unassigned user story tab and later drag to the release they want that user story to be in. User can create a new backlog item which can be user story, epic, spike, defect etc.
To create a new story from unassigned story tab,
1. Click on Add Story button.
2. Once user clicks on add user story, quick add view will open.
3. Select the story type, give name to the story and estimate the story.
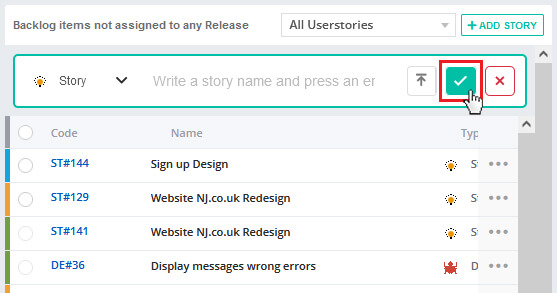
4. Click on Story link on quick add view.
5. On click, full view will appear.
6. Fill more fields in Story Details.
You can fill all the details one by one.
Add story directly from release backlog.
User can directly add a new backlog item which can be user story, epic, spike, defect etc.
To create a new backlog directly from release backlog,
1. Go to the Action Menu of release.
2. Click on Add User Story option.

3. On click, add user story drop down will open asking for required information.
4. User needs to select story type that can be story, epic, spike, defect etc. User can give appropriate name to story and estimate the story.
5. To save a new story click on save button.
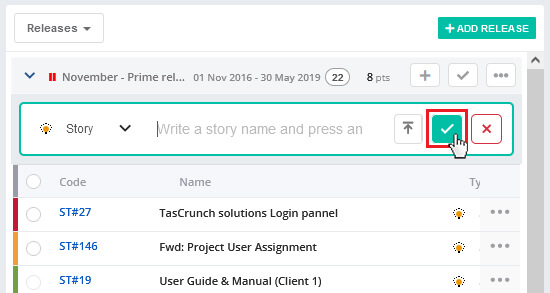
6. Once you create a new story successfully it will displayed under that particular release.